Tuesday, October 7, 2014

Georgia O'Keefe Inspired Watercolors

This is the first watercolor project we do in Painting 1. We practice with watercolor, create color wheels, and go outside and paint flowers in the open air. Then we begin this project. There is a presentation on Georgia O'Keefe with a little bio and examples of her art work. The students then create a collage that is inspired by O'Keefe. The collage is what there composition will be. Once they have created their collage, the student begins their final composition. Things they need to think about are: Color scheme, composition, craftsmanship. By creating a collage, we are avoiding just printing images off the internet, which I despise! I just realized my best examples all integrated birds into the composition. But, they all have great color schemes, interesting compositions and are very neat. 


Sadie S.

Tasha Y. 

Madison M.

Form and Value still life, with a little critique on the side


Art 1 Still life
In art 1, I follow the elements of art. The focus for this still life was form and value. Yeah, still lifes are super boring, the students don't really like it... to start with. I set up the still life and all the kids groaned and moaned. I gave them all view finders (which we had used before) and a piece of white sulphite. The view finder is great to help with where to start. As the drawings progress, and the students are kind of timid about getting dark, I kept pushing them to see a whole range of value. Previously, we had created value scales. I went as far as growling DARK, and using a high light voice for light. The students find it funny, but it reaches them. As the students continue to draw, they can see their own improvement and actually start to enjoy the boring old still life. The following are a variety of examples of finished products. 


Hunter L. 

Richard T. 

Ali G.

The Critique
After each project, my class critiques in some way. For this projects we did a gallery group critique.

I placed all the drawings up with numbers and no names. The students are put in groups and have to answer the proceeding questions and then share with the large group. Its a great way to see everyone's work, compare and contrast, but also give constructive criticism. 


Group Critique- Still life; value and form
Group Members
As a group please answer the following questions
  1. Pick 3 compositions (drawings) tell me what is successful about these drawings- be specific


  1. Using the same 3 compositions, what can be improved


  1. As  group discuss what was the most difficult thing about this assignment, what was the easiest?


  1. Name 3 things you learned by drawing this still life


Monday, February 10, 2014

Focus on emphasis and color


In my Drawing 1 class, we are focusing on the principles of design. For the first project, I set up a still life. The focus on the still life was emphasis. We used view finders, and the student had to find a view that the still life touched 3 sides of the view finder. They were to focus on correct perspective and "Draw what they see" (Betty Edwards reference). To finish the composition, they wanted the emphasis to be on the fruit. So using pastel pencils, they created value with color on the fruit. The rest of the project was done in fine tipped Sharpie. It was a really nice beginning project, and help me to see the skill level of some of the students that I had not had in class before.

Tuesday, September 3, 2013

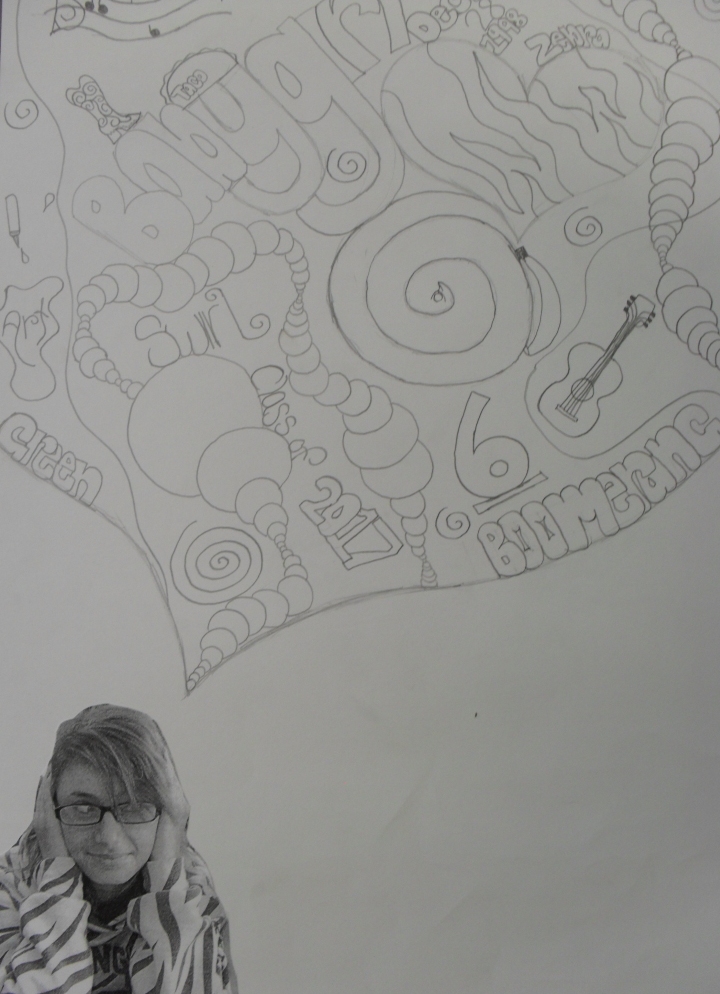
Ice Breaker Brainstorming

The first days of school are always crazy. For me, I have a lot of shuffling of kids. My Intro to Art classes are the largest, and mostly new students that I haven't had yet. This activity was for me to get to know the students. I took pictures of all of them the first day (this helps me remember names). The students cut their picture out then glued it to another sheet of paper. They created a thought bubble and inside that bubble they were to doodle about themselves. Each student presented their final brainstorming to the class. The result was really nice, and I got to know the new students (names and interests), plus I got to see a little preview of their abilities!


Thursday, January 17, 2013

Soft Slab Canopic Jars

Canopic Jars are a great cross curricular lesson for students to learn about soft slab vessels and Egyptian art and customs as well, and a literary reference of symbolism.

For Canopic jars, I show students how to create soft slab vessels. The vessels will have lids. This is the lesson where I show students how to create lids with flanges, or what I call keyholes to keep the lid on. I also teach them the history and purpose of Canopic jars from Egypt. The students will look at symbolism of animals. I want them to choose an animal that might have attributes that they posses as well.

The animals on the lids can be made from pinch pots to start with ( reminding the students that there has to be a way for air to escape from the pinch pot).


Drape Mold Vessels with Sgraffito Decoration

In Ceramics 1 I try to teach the basic methods of handbuilding; pinch, coil, slab (soft and stiff), and molds. To make drape mold vessels, we use a plaster mold to create 2 halves, then put them together. The students' vessels need a foot, lip and a pulled handle. The decorative technique used on these pots is a sgraffito. Sgraffito is scratching through slip or underglaze to create a design. The students are graded on creativity, craftsmanship, use of materials, and effort. The students participate in a peer critique for these projects.


(sorry the pics are a little washed out!)

Gustav Klimt Rhythm and Pattern

This a great lesson to put together several elements of art, such as color, line, value, space and some principles of design such as rhythm and pattern. Within this lesson, I also introduced the compositional rule of thirds.


We looked at several paintings of Gustav Klimt's. As a class, we discussed his use of pattern and rhythm. Also, we talked about Klimt's use of metallic paints.

The students then we introduced to the rule of thirds. They had to create a composition using this method of creating a composition. Their art work also had to include, rhythm and pattern. The main focal element could be anything of their choice. The previous unit, we had learned about color and color schemes. So to tie the units together, the students had to make a choice about the color scheme within this composition. The media was water colored pencils and metallic paints. Within the water color pencil, the students needed to show value gradation as well.

This project involved a lot of different elements and principles of art. I used it as a final project in my Art 1 class.

Below is a handout I used in class to help students take notes.

Intro to Art- Rhythm, Composition, Color and Klimt

Objective:

You will be creating a composition in the manner of Gustav Klimt. You will be choosing a color scheme, such as warm, cool, analogous or complimentary colors. When creating a composition you will be using the rule of thirds. You will use rhythm to create the background.

Rule of Thirds:


Rhythm:

Pattern:


Procedure


  1. You will choose a person, animal or building.
  2. You will draw the item on the paper using the rule of thirds.
  3. Then you will use watercolors to set a “tone” on the background, within the color scheme you have chosen.
  4. Once the object is drawn you will create a rhythm and pattern like that of Gustav Klimt.
  5. The pattern will be completed using colored pencils. The item you have drawn will also be completed using colored pencils but does not have the follow the color scheme. You could also use oil pastels if you choose
  6. To finish the project, you will use tin foil or metallic paint to accent areas within the pattern.